
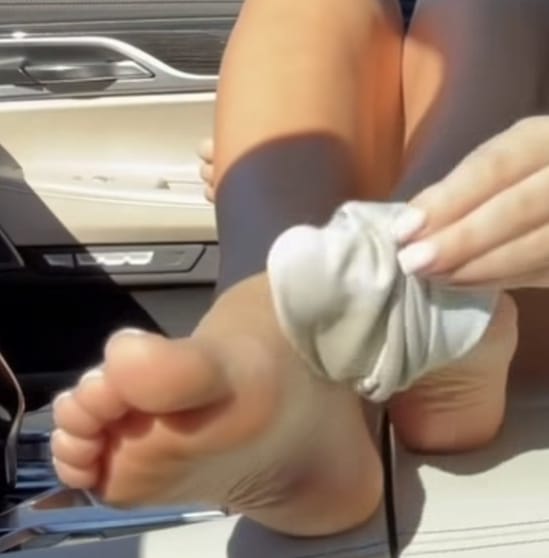
What Is Foot Photography?
Foot photography is a specialized style of photography that focuses on creating visually appealing images of feet, footwear, movement, and related details. It can appear in fashion photography, commercial campaigns, lifestyle content, beauty portfolios, and creative photography projects.
Although the subject may seem simple, successful foot photography requires many of the same skills used in other types of photography. Lighting, composition, camera position, background selection, focus, and editing can dramatically change the final result.
For photographers and content creators, learning these fundamentals can make images look cleaner, more intentional, and more professional.
Why Is Foot Photography Popular?
Visual platforms have made niche photography more accessible than ever. Photographers no longer need a traditional studio or professional publishing deal to experiment with a specific photography style.
Foot photography can be used for several purposes, including fashion portfolios, footwear photography, beauty campaigns, lifestyle images, and social media content.
Creators interested in developing their photography skills may also benefit from reading How to Become a Foot Content Creator: A Complete Guide, which explores the broader process of planning and producing specialized content.
1. Start With Good Lighting
Lighting is one of the most important elements of foot photography.
Natural window light is often an excellent starting point because it can produce a soft and balanced appearance without requiring complicated equipment.
When shooting indoors, position the subject near a large window and experiment with the direction of the light.
Try photographing with the light coming from the side rather than directly from the front. Side lighting can help create depth and make the photograph appear less flat.
Harsh direct light can create distracting shadows, so softer lighting is generally easier for beginners to control.
Experiment With Different Times of Day
Natural light changes throughout the day.
Morning and late-afternoon light can produce a softer appearance, while midday sunlight is usually stronger and may create more noticeable shadows.
Taking several test photos is one of the easiest ways to determine which lighting works best for a particular location.
2. Choose a Clean Background
The background should support the photograph rather than compete with the main subject.
Simple backgrounds can include wooden floors, neutral walls, clean fabrics, outdoor surfaces, or carefully arranged studio settings.
Before taking the photograph, check the entire frame for distracting objects.
Small details that seem insignificant while shooting can become surprisingly noticeable in the final image.
Match the Background to the Concept
Different backgrounds communicate different visual styles.
A minimal indoor background can create a clean editorial appearance, while outdoor locations can produce more natural lifestyle photography.
For footwear photography, the surrounding environment can also help communicate how or where a particular product might be used.
3. Experiment With Camera Angles
Camera position has a major influence on composition.
Instead of taking every photograph from the same perspective, experiment with several positions.
Overhead photography can create symmetrical compositions, while lower camera positions may emphasize footwear or movement. Side angles can work particularly well when the surrounding environment is an important part of the photograph.
Take multiple versions of the same composition and compare them afterward.
Digital photography makes experimentation inexpensive, and reviewing several angles can quickly reveal which compositions work best.
4. Pay Attention to Composition
Strong foot photography should still follow the fundamental principles of visual composition.
One useful technique is the rule of thirds. Instead of automatically placing the main subject directly in the center, imagine the frame divided into a three-by-three grid and experiment with positioning around those lines.
Negative space can also be useful.
Leaving intentional empty areas around the subject can create a cleaner photograph and provide space for text when an image is later used in advertising or social media graphics.
Look at the Entire Frame
Composition is not only about the primary subject.
Before pressing the shutter button, look at the corners and edges of the photograph.
Ask whether every visible element contributes to the image.
Removing one distracting object or slightly changing the camera position can sometimes improve a photograph more than extensive editing afterward.
5. Keep the Camera Steady
Sharp images generally look more professional than photographs affected by accidental camera movement.
When using a smartphone, hold it securely with both hands whenever possible. A small tripod can also be useful when photographing indoors or experimenting with carefully arranged compositions.
For cameras with manual controls, shutter speed should also be considered when shooting without a tripod.
The goal is to capture a sharp image before relying on editing software to correct problems.
6. Use Focus Carefully
The viewer should immediately understand which part of the photograph deserves attention.
Modern smartphones and cameras usually allow photographers to select a specific focus point.
Take advantage of this feature rather than allowing the device to make every focusing decision automatically.
If footwear or another detail is particularly important, make sure that area is sharp and clearly visible.
7. Develop a Consistent Photography Style
Consistency can make a collection of photographs feel more professional.
This does not mean every photograph needs to look identical. Instead, consider developing recognizable characteristics across your images.
These could include similar lighting, backgrounds, framing, editing, or overall visual mood.
Consistency becomes especially valuable when photographs are displayed together in a portfolio, gallery, website, or social media profile.
8. Edit Without Overdoing It
Editing can improve a photograph, but excessive editing can easily become distracting.
Start with basic adjustments such as exposure, highlights, shadows, contrast, cropping, and white balance.
The objective should usually be to strengthen an already good photograph rather than completely reconstruct it.
Maintaining a similar editing approach across multiple images can also help establish visual consistency.
9. Plan Your Foot Photography Before Shooting
Planning can save significant time.
Before starting a photography session, decide what kind of images you want to create.
Consider the location, background, lighting, camera angles, props, footwear, and intended use of the photographs.
Creating a simple shot list can be particularly helpful.
For example, you might plan an overhead photograph, a side-angle image, a close-up detail shot, and a wider environmental photograph.
Having this list makes it easier to produce a varied collection without forgetting important shots.
10. Practice and Review Your Results
Improvement in photography comes from repeated experimentation.
After every session, review the photographs carefully.
Identify which lighting conditions worked best, which compositions were strongest, and which technical problems appeared repeatedly.
Rather than judging individual photographs only as good or bad, try to understand why certain images are more successful than others.
That process gradually develops stronger photographic instincts.
Common Foot Photography Mistakes
Beginners often focus entirely on the subject while overlooking the rest of the photograph.
Common problems include cluttered backgrounds, inconsistent lighting, accidental shadows, awkward cropping, excessive editing, and insufficient focus.
Another common mistake is creating many nearly identical photographs.
Changing the distance, camera height, orientation, background, and composition can produce a much more useful collection of images.
You can also read about:
Foot Photography FAQ
Do You Need a Professional Camera for Foot Photography?
No. Modern smartphones can produce excellent photographs when lighting and composition are handled carefully.
Professional cameras provide additional control, but equipment alone does not create a strong photograph.
What Lighting Is Best for Foot Photography?
Soft natural light is a good starting point for beginners. Window light can provide even illumination while remaining relatively easy to control.
How Can You Make Foot Photography Look Professional?
Focus on clean backgrounds, controlled lighting, sharp focus, intentional composition, consistent editing, and careful planning.
Should Foot Photos Be Edited?
Basic editing can improve exposure, cropping, color balance, and consistency. However, editing works best when the original photograph is already well composed and properly lit.
Final Thoughts on Foot Photography
Good foot photography combines technical photography fundamentals with creativity and attention to detail.
Lighting, composition, camera angles, backgrounds, focus, and editing all contribute to the final image. You do not necessarily need expensive equipment to begin; understanding how to control the elements inside the frame is considerably more important.
Start with simple setups, experiment with different compositions, and review your results after every session. Over time, developing a consistent process and visual style can turn basic photographs into a polished photography portfolio.
